To create a Group, an Association which can only be created by an ICG Admin needs to exist first. An Association shows the relationship between a Publisher (Vendor) to existing Pub Accounts, Imprints and LSI Accounts as well as being linked to various Operating Units: IPS, IBC, LSI and CS. An Association can have multiple Vendor IDs. Link Users to Groups or Associations. You can think of a Group as being a subset of an Association.
Here is an example of a Pub Admin creating a group. An Association has previously been created by an ICG Admin.
The following Vendor IDs were added to Association:
Graphic Art LSI
Graphic Arts (pub nums)
S048 – Graphic Arts Books
Logged on as a Pub Admin, follow the path below to access the Groups List page.
Click User Name >> Manage iQ >> Groups >> Groups List page
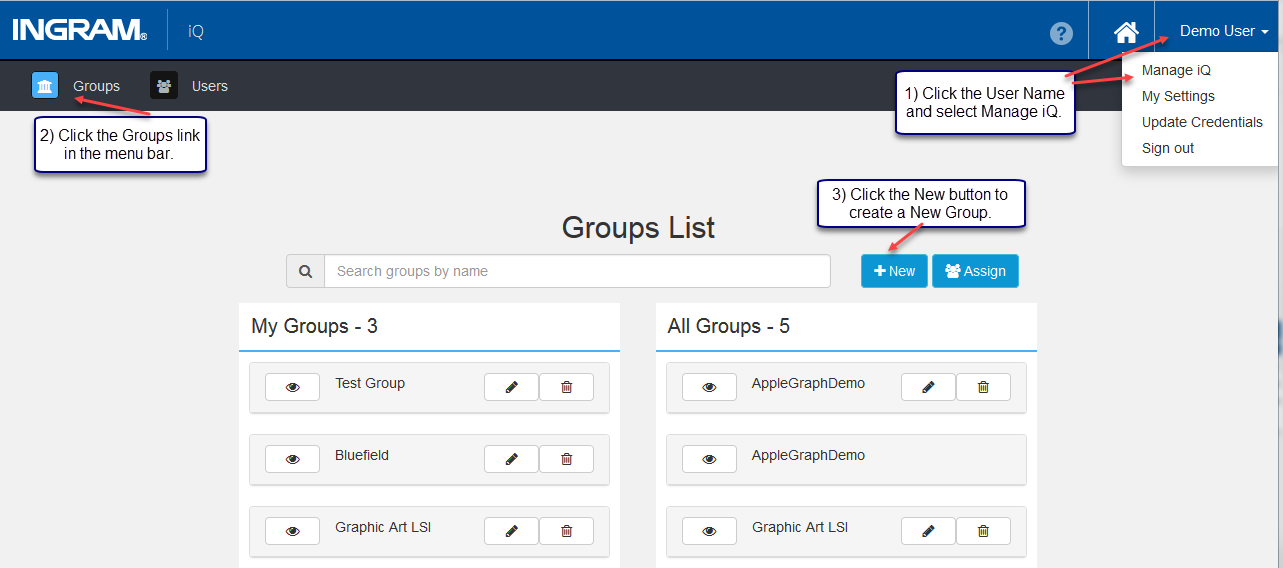
Follow these steps to complete creating a New Group.
- Click the New button to reach the New Group page.
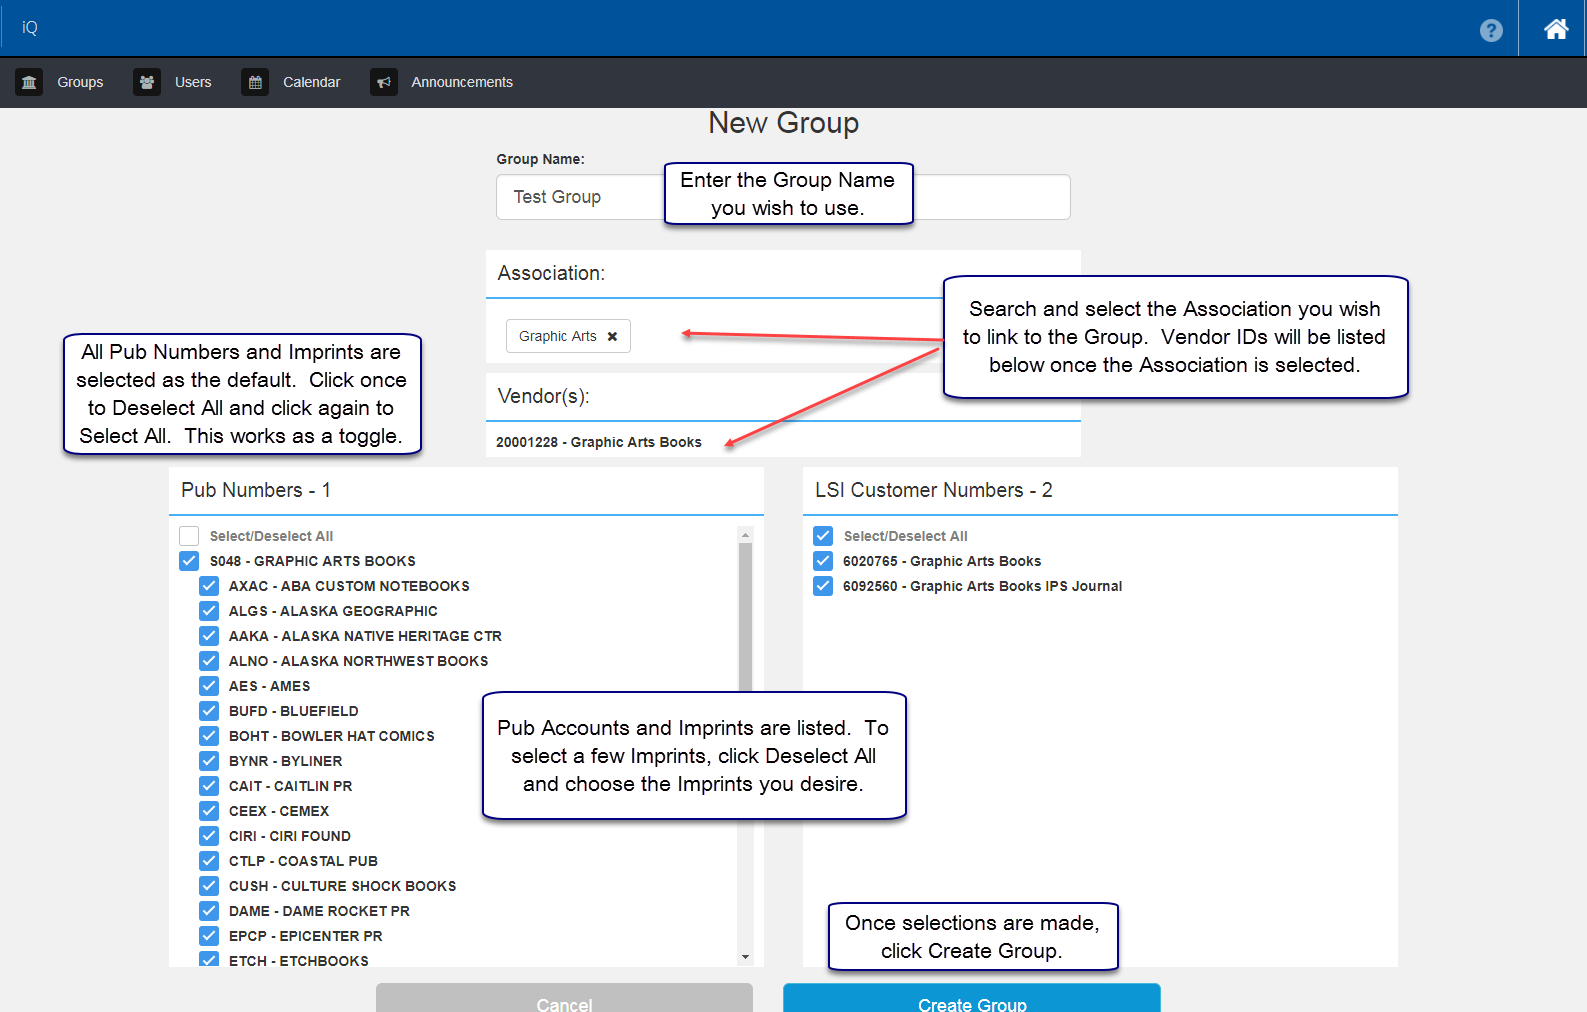
- Group Name - Enter the name of the New Group.
- Search Association - Search for the Association you wish to link to the Group and select it.
- Once you select an Association, a Vendor(s) section will appear listing the Vendor IDs. These are the Publisher/Vendor IDs linked to the Association the ICG Admin created.
- Pub Account numbers and Imprints display under the Vendor(s), if they exist. Check-mark the Vendor(s), Pub Accounts and Imprints you want to include in the Group.
- Click Create Group.
Test Group is a subset of Association S048 - Graphic Arts Books. If desired, multiple Groups may be created from an Association. Once a Group is created, it appears in the Pub Admin - Groups List where it may be viewed (eye), edited (pencil), or deleted (trashcan) by the creator of the Group or an ICG Admin.
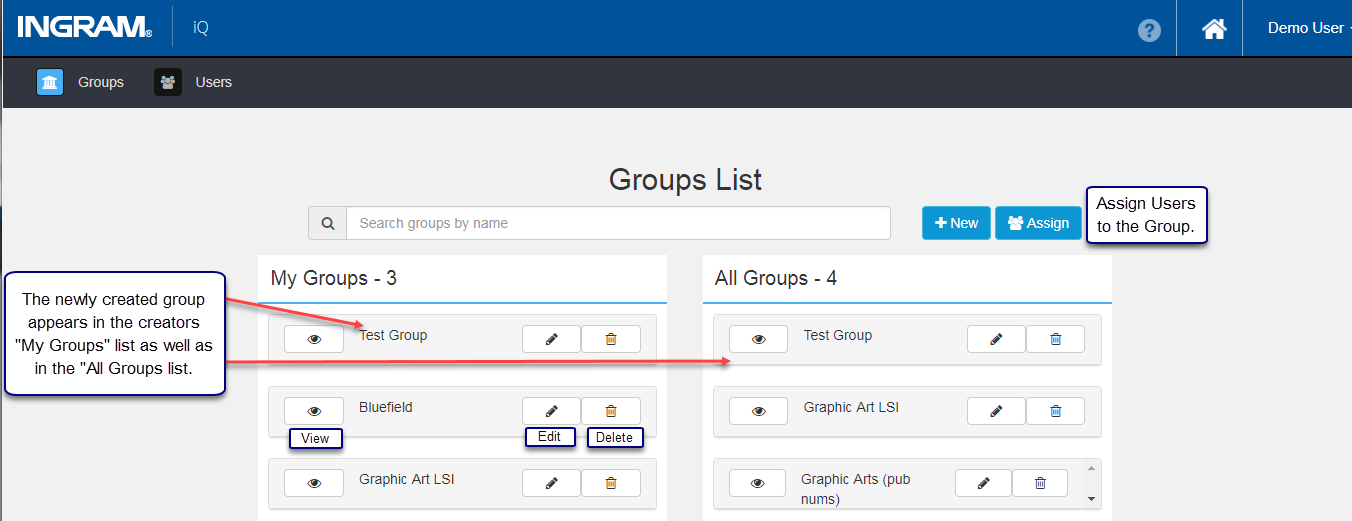
Assign Users to the newly created Group. Creating a Group does not automatically assign the creator to the Group. Clicking the blue Assign button accesses a screen to select the group and user. Once you make selections, click the Assign Group button. You see the new group in the users' My Settings page in the Active Group section.
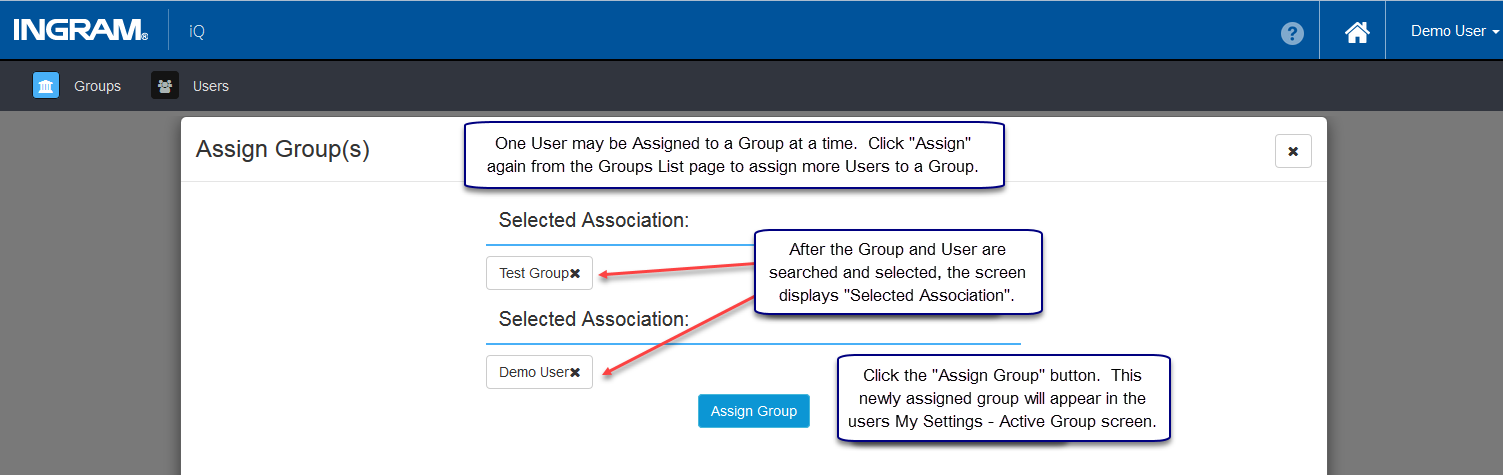
After assigning user: Demo User, to Test Group, it appears in the Active Group section of the My Settings screen. To see Active Groups, click the user name in the top right corner and select My Settings from the drop-down. Select any group from the list of Active Groups and Save the selection to change the Active Group.
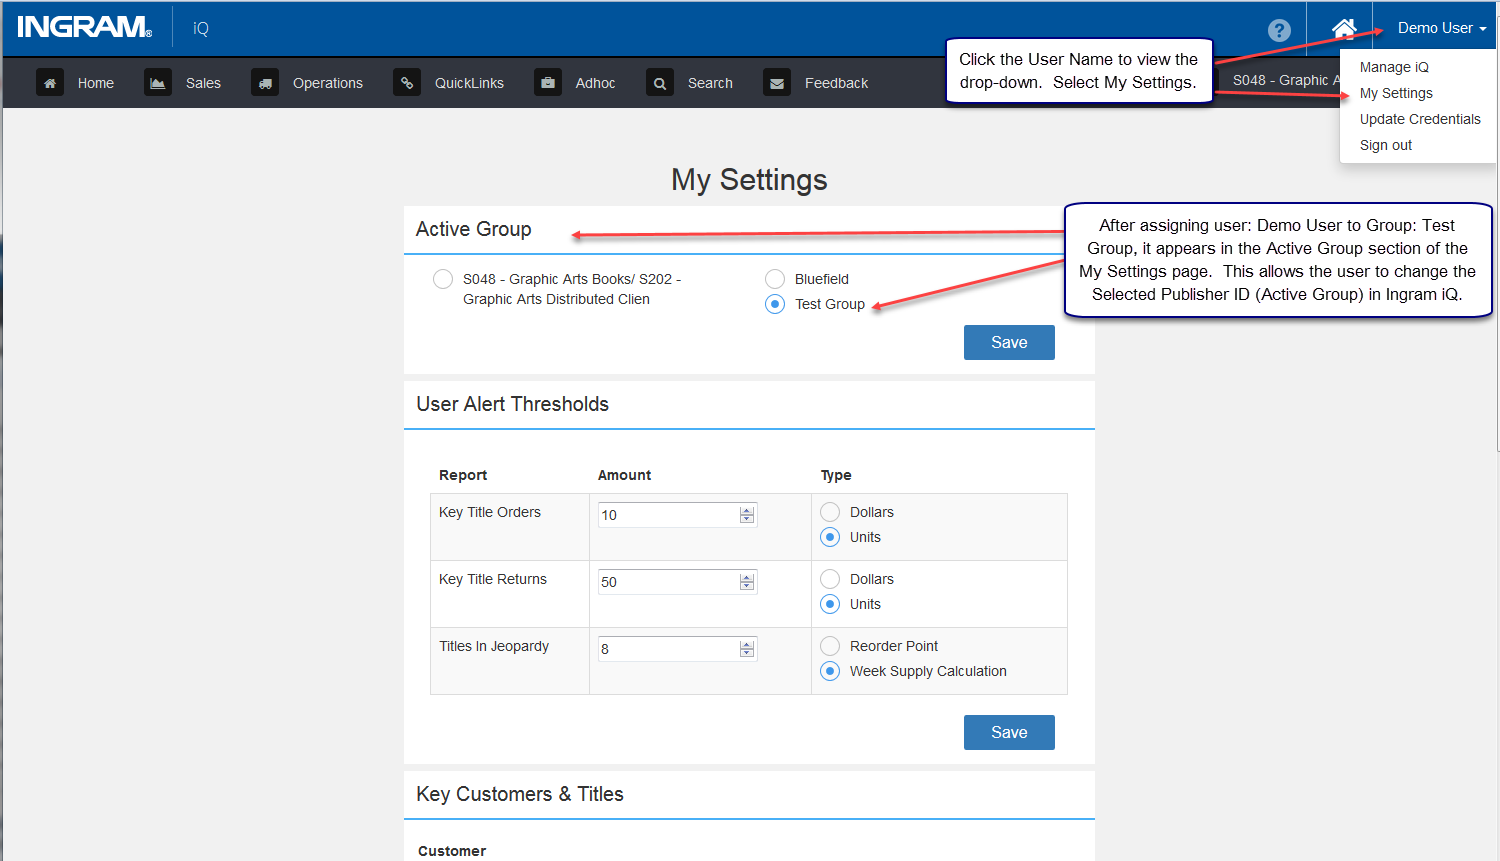
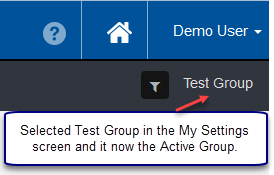
The Active Group is listed under the user's name in the top right corner. Once another Active Group is selected and Saved, it will be shown after the page is refreshed.
Comments
0 comments
Please sign in to leave a comment.